Thursday, October 2, 2014

Plain boxed Pasta to Magnificent Meal....

This is an exciting dish to me, because I made it solely by raiding the fridge and pantry, no extra trip to the store required.


The idea started out with ground beef and giant shell noodles.  Then the "what can I do with this" kicked in, and before long it invariably turned to "guess we're having Italian".
I like to pick up the one pound packs of lean ground pork at my market.  I first started to buy these to make my own breakfast sausage instead of having to grind my own pork. One pound of ground pork is about half the price of one pound of breakfast sausage, and all you have to do is add some spices!!  So I thought why not turn the ground pork into an Italian version, like Italian sausage.  So off on my journey I went.

Here's what you will need:
1 lb ground beef, I used chuck
1 lb ground pork, lean
1 tsp Italian seasoning
1 tsp dried Basil
1 tsp Fennel seeds
1/2 tsp granulated onion
1/2 tsp black pepper
2 tsp Granulated garlic
4 oz can Italian flavored tomato sauce, or just add a little Italian seasoning and basil to a can of plain tomato sauce
(2) 16 oz jars of Pomodori Bruschetta spread
OR
32 oz of chunky marinara sauce
16 oz Mozzarella Cheese, grated
6 oz Parmesan cheese, grated
Red pepper flakes
Salt to taste

Start off by browning the beef and pork with all your dry ingredients added.  Be sure to break up meats as they brown.  Once done, allow to cool.  Meanwhile, grate cheeses and cook pasta to very al dente stage, drain and place on parchment paper until you need them.  After meat has cooled spoon it into a med. size bowl, add 3/4 of your grated Mozzarella and all of the Parmesan cheeses.  Also add about 1/2 of the 4 oz. can of tomato sauce. Mix together well.


Spray the bottom and sides of a 13x11 baking dish and pour the remaining 1/2 can of tomato sauce into the bottom of your dish and spread around.  This will help to keep the pasta from sticking to the bottom.


Begin stuffing your shells with the meat and cheese mixture.  (Some of my pasta fell apart while boiling, but I found I did not need them all anyway).  Place your stuffed shells in your prepared baking dish, if you have any meat left, just sprinkle it on top of the stuffed shells.  Pour on your sauce (Bruschetta Spread or chunky marinara sauce) and top with remaining Mozzarella cheese.  Add Red Pepper flakes if desired.


Bake in a 400° oven for about 40-55 min.  My baking dish was a thick ceramic type dish, so baking took a little longer than is would in a pyrex dish.  Bake until nice and bubbly.


My house smelled like a real Italian restaurant and I even got a "that was really delicious" from my husband.  So simple, yet so yummy, truly a win, win for me.  Serve with some fresh homemade Italian bread or Foccacia loaf.  Below are two links to some homemade bread recipes using a Bread Machine.

Monday, September 22, 2014

Smoked Cheese Balls......

I love it when I have a real, true reason to play with cheese.  This time it is for another one of those fun, friendly little food challenges I participate in.  BALLS, that's the challenge this week, make a ball out of any food, slap a recipe on it and share.  Ok, I can do this!!!  Of course the very first and ONLY thing that comes to mind is cheese balls. Now what road do I want to take with these.  Besides loving cheese, I LOVE smoked cheese, so that's step one.  Now you can ask a dozen folks how to smoke cheese and you will invariably get a dozen answers, so all I can do is share the way we have been smoking cheese for years now.

We use a charcoal/wood smoker, so our cheese gets the real wood smoked flavor in a matter of minutes, literally.  Of course, if you don't have the means to smoke your own cheese just buy some at your local market.
For hard cheeses: When the smoker is about 200° we place the cheese on the rack, leave for about 4-5 minutes, flip it, leave on another 4-5 minutes then remove it and put in fridge till it hardens again.  For cream cheese we place it on parchment paper and leave on about 10 min. then remove and refrigerate.  It's just that simple and the cheese has the most awesome mild smoke flavor.  We normally use mesquite or hickory wood to smoke with.  Any smoked cheese is delicious though.


Ingredients you will need:
8 oz smoked or plain cream cheese
16 oz smoked sharp cheddar
3 slice bacon, cooked and crushed
2 tbsp. finely grated jalapeno
1 tbsp. finely grated onion
1 guajillo dried chile pepper, crushed
1 c fine jalapeno bread crumbs

I like to cook my bacon in the oven, no mess and it comes out perfect every time, thanks Rachael Ray for this tip!!!  Once bacon is done and cooled, pop into food processor and pulse until you have fine crumbs.  You will do the same with the dried guajillo pepper.

In a mixing bowl, add cream cheese, grated jalapeno (I use a microplane to grate my jalapeno on onion), grated onion, crushed guajillo and bacon.  Mix until well incorporated. Then add shredded cheese a little at a time until all is mixed together very well.  Remove and divide into four pcs.  Roll each into a ball.

I had some jalapeno cheese bread in the freezer, so I got it out, let it sit out in the air overnight, then broke it up and placed in food processor and made crumbs.  You can use plain bread crumbs, crushed walnuts or pecans.

After making my balls I rolled them in bread crumbs then gently patted more crumbs on to insure they adhered to the balls.  Then just refrigerate until ready to slice and serve. Place each in a small ziploc bag if you are not using within a few hours to keep them from drying out.

So next party or get together, make yourself and your guests some delicious cheese balls! Hope you enjoy, we sure did.


Saturday, August 30, 2014

Dog days of summer.......

You know you're a die hard when it's 100° in the shade and you still fire up the grill.  It's a sickness you know!  Today hot dogs are calling my name.  I love em...love em all...dolled up and dressed to kill...or just plain and homely, I love hot dogs.

I've been craving chili dogs but felt like I wanted a little some'em some'em different today, so after scratching my head for a little while, this is what I came up with.  Chili cheese jalapeno onion dog.


Ingredients you will need:

**Your favorite hot dog, today I used Nathans
**Cheddar cheese, grated
**Fresh jalapenos and/or fresno peppers, sliced into rings
**Sweet onion, sliced
**Chili
**Buns

This grilling basket is one of my favorite and most often used grilling accessory, great for grilling veggies or thin sliced meats. Place your onions and peppers in grilling basket and grill over high heat tossing often with tongs.


Meanwhile you want to grill your dog, heat your chili, and toast your buns. Takes a little multitasking to do it all simultaneously, so best to attempt this before the sun and beers go to your head!


To make this a simple all-in-one cook, after my dogs are cooked to perfection, I place them in the toasted buns, spoon on some warm chili, top with some grated cheese, and the grilled onions and peppers.  Then I place them on a part of the grill that does not have direct heat and close the lid.  In just a couple of minutes you have the perfect dog, every time.

Every dog needs a good chili and this is one I really like for hot dogs.  The recipe makes a BIG pot, so when I make it I like to divide it up and freezer it so I always have some on hand.


Hot Dog Chili

5 lb. lean ground beef
5 clove garlic, grated
1/2-1 c sweet onions, chopped
4 c beef broth, homemade or reduced sodium
1/2 c ketchup, reduced sodium opt
2 tsp spicy mustard
2 tsp lemon juice
2 tsp sugar
1 tsp coarse sea salt
2 tsp black pepper
1/4 c chili powder, mild or hot
3 Tbsp. cumin
2 tsp adobe chili powder
1 tsp Mexican oregano
1 Tbsp. granulated garlic
1 Tbsp. granulated onion

Directions
1 Chop onion, grate garlic and place both in large soup pot with a little (2 tsp) olive oil, add ground beef and cook till beef is light brown.
2 Add remaining ingredients stir well, place lid on and simmer for about 30 min.

3 For a finer chili, place chili in food processor small amounts at a time and pulse. This will grind up the meat and make your chili very fine!

So next time you get hungry for a hot dog, whether you are feeling adventurous, or just want something plain and simple, go out and fire up that grill, you know you will thank yourself and so will your family.

Here are a couple more chili recipes that would work great with hot dogs:
http://www.justapinch.com/recipes/soup/chili/my-texas-chili.html
http://www.justapinch.com/recipes/main-course/mexican/chili-sauce.html


Sunday, August 24, 2014

A day in the life of a smoked roast......

Ah, so my Saturday morning begins, anticipating the sun rising and the glorious smell of 
hickory smoke wafting through the air as I commence on my morning chores.  Todays cook is going to be Chuck roast.


So lets go back to the beginning.  Yesterday I found some beautiful chuck roasts for a lovely price, so I picked up a few not knowing exactly what I would be using them for. Well that didn't last long, on the short drive home from the store I knew I would be smoking two of them for some scrumptious meals later in the week.  Having my cabinet full of spices on top of spices, most everything under the sun, I had to decide on what flavor profile I would be using, knowing I needed something that would compliment the smoke flavor of the hickory wood, I decided on Tatonka Dust. So before I went to bed I sprinkled a generous amount on each side, rubbed them down, and put them in the fridge for a long nights sleep.


What is Tatonka Dust you ask?  Well taken right from the source since I can't described it any better myself:

"Tatonka Dust has a unique flavor-it is Worcestershire powder, soy sauce powder, and a charcoal seasoning base mixed with onion, garlics, peppers, salts, and some other secret spices that blend together perfectly for that one of a kind flavor".


I like to use charcoal to start my fire, then add wood that I have soaked overnight in water. The soaking of the wood helps to keep it from burning up too fast and it gives you more smoke than dry wood does. Todays goal is to keep the smoker right around 225° Mmmmm, the smell is intoxicating!


 After smoking these beauties for about 3 hrs I wrap them in foil and let them continue to cook on the smoker.  For this particular cook, I'm wanting a super tender, pull apart roast, so I will continue to cook until internal temp reaches 190-195°

Mission accomplished!  I always love the reveal, anticipating what the final product will look like, will taste like, and rarely am I disappointed, today being no exception.  A juicy, fork tender roast with just the right amount of hickory flavor and seasoning, sure glad I smoked two of these babies, they came out just perfect.


So next time you fire up that smoker, show a Chuck roast a little love, and try some Tatonka dust, we just love it!

Saturday, August 23, 2014

Pita Pocket Burgers

And today's burger journey begins.  A loved one is coming home today for a visit, and by request it's Burgers!!!


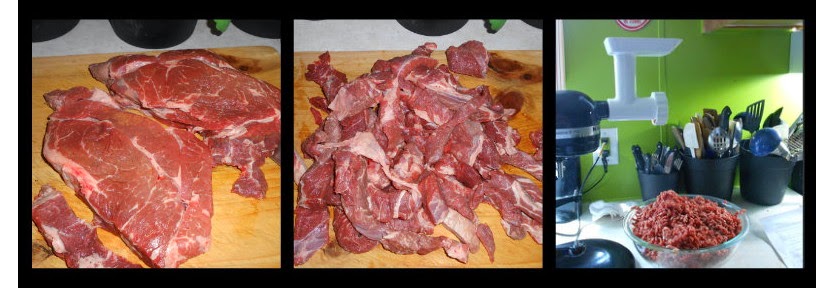
My usual go to for making burgers is chuck roast.  I have used many other cuts of beef but chuck is the favorite here.  If you have never had the opportunity to grind your own meat for burgers, let me tell you, it's something you need to try, someday, someway. It enhances the flavor of the burger ten fold.


Ingredients:
(Makes 6  half pound burgers)
3 lbs ground chuck
3 pita pockets, cut in half
1 lb mozzarella cheese, grated
6 large mushrooms, sliced
1 large sweet onion, sliced

I got the idea to make the "pita" burger when I bought some low carb pita pockets recently.  They are very thin and when slightly grilled, they are astonishing!  I like to enjoy my "burger" and not fill up on bread, so these are perfect.  The fact that they are low carb was purely accidental,but a huge plus to me. 


First I formed my patties in a round shape as I normally would.  Then I cut off the top 1/3 and pat the flat edge by hand to "tighten" it. If you are grilling your burgers outside you really don't need to drowned them with spices, let the fire or coals do the seasoning for you.  Since we already had the smoker going today, we ended up putting the grate in the smoker box and cooked the burgers over hickory wood.  My personal preference is a burger that is cooked to medium.  But any way you shake a stick at it, grilling burgers outside, wood, charcoal, or gas, is the way to go!


Grill as you normally would, once burgers are done to your likeness, top with grated cheese while still on the grill, close lid for a couple of minutes, then remove patties, it doesn't take long for the cheese to melt!
Grill the mushrooms and onions, toast the pita bread.  Assemble and enjoy the fruits of your labor.

I have an assortment of grilling baskets and flat slotted trays to use for grilling veggies. Look in the grilling section of any major store, or go online, the options are limitless.

Next time you're craving a burger, fire up that grill, you won't be sorry!

Thursday, August 21, 2014

Pizza Poppers, not your average joe.....

Ah...the good ol "popper".  Whether you grill them, smoke them, or bake them off in the oven, nothing beats a popper.  Today was Pizza day, so baking it was!  There are thousands of ways to stuff a pepper, but personally I've never turned one into a "pizza". The idea came to me while surveying the contents of my fridge....5 lbs of Mozzarella, 2 lbs of Mini Sweet Peppers, and pepperoni....it was fate!


Ingredients:

12 mini sweet peppers
1 c mozzarella, finely grated
1/2 c finely chopped pepperoni
1/2 c finely chopped canadian bacon 
1/2 c pizza sauce

The amounts here are approximate because you will have a variety of different size peppers.  I like to lay my peppers out and see what side they lie the flattest on, that way you will have a more stable pepper.  Then you will cut your peppers off diagonally just above the stem line.  Now remove what few seeds are inside.


Next dice up the pepperoni and canadian bacon and grate your cheese and mix with pizza sauce altogether in a bowl, it's just that simple.


Now gently press as much filling inside each pepper as you can, leaving it heaping on top.  


Bake in a preheated 425° oven for about 20 min.  If grilling or smoking, time will depend on temp of grill or smoker.

Let me tell you, these are ADDICTING!  If eating while still hot, be sure to use a napkin, they are juicy.  The juiciness subsides as they cool.  So next time you're in the mood for some pizza flavored goodness, give these a try.  Much less work than making pizza from scratch, but all the awesome flavor you get in a pizza.  Play a little, try to mix and match your own filling ingredients.

Here are  a few more "poppers" you might like to try:
http://www.justapinch.com/recipes/main-course/turkey/cheese-suffed-sweet-peppers-with-sauce.html

http://www.justapinch.com/recipes/appetizer/appetizer-vegetable-appetizer/brat-stuffed-peppers.html


http://www.justapinch.com/recipes/appetizer/appetizer-vegetable-appetizer/prosciutto-wrapped-mini-sweet-peppers.html

Tuesday, August 19, 2014

The many faces of Hash

I love finding treasures tucked away in my freezer that I had forgotten about.  Yesterday was my lucky day.  While putting my reorganization skills to good use, I found a bag of smoked ham I had stashed a while back.  I wasn't sure at the time what it would become, but I knew it would be on Tuesdays menu.
Motivated by a friendly five ingredient food challenge I was participating in, I put my thinking cap on and BAM, hash was born.  I've made hash many times, most of them included some type of grilled or smoked meat I had leftover, even sausage links.  The beauty of hash is, there are no rules.  Throw your favorite ingredients together and call it hash!  Of course I always use potatoes, and peppers and onions, and for some reason mushrooms just seem to fit in as well.  Keeping with my five ingredient limit, I knew I need to be a little more creative than usual.

I could not use oil to "fry" my potatoes in, so I cut off some fat and skin from the ham and rendered it down to substitute for oil.  

Ingredients:
Smoked ham, cubed 
Russet Potatoes, cubed
Anaheim peppers, diced 
Red onion, large chop
Mushrooms, sliced

In the end I used 2 c cubed ham, 5 med. potatoes, 2 anaheim peppers, 1 onion and about 6 brown mushrooms.  I washed the potatoes and left the skin on.


I cooked the potatoes and peppers in the ham fat over med high for about 15 min, stirring often, then added the onion.  Cooked another 15 min till slightly fork tender, then I added the ham and mushrooms.  Then I let it cook about 10 min longer until the ham was warm and the mushrooms were semi-tender.  I added black pepper along the way since salt and pepper were "free" ingredients.

I served this to my hubby with fresh cherry tomatoes from my neighbor, and a nice slice of mozzarella cheese.  On a more industrious day I would have served with sunny side up eggs.

So next time you have some leftover beef, pork, sausage, even chicken, but don't have enough to serve as a entree`, make a big skillet of hash and enjoy!

Here are some more hash recipes you might enjoy.