Saturday, June 9, 2018

Cooking Solo-Roasted Chicken and Peppers


I'm a simple home cook that enjoys big flavors, 
easy recipes, and tummy satisfying results.


My cooking style and flavor profiles have not changed, but my reason for cooking has, and from here forward my blog will focus on my new beginnings.  Here is little backstory:  After 32 years of cooking for my family, I find myself facing the challenges of cooking for one.  At first I used it as an excuse to eat whatever I wanted, whenever I wanted, and to get take-out whenever I felt like it, after all take out IS much cheaper for just one person.  After a while I began tiring of the grab whatever is in the fridge mentality, which is almost always cheese and tortillas, and although I love these things, I need REAL FOOD!  So my stale brain kicked in the other day at the supermarket when I became hungry while shopping.  I hit the frozen food isle telling myself buying from the market is cheaper than buying take out, and these days you can get just about anything from the freezer section that you can from your favorite take out joints and a heck of a lot cheaper.  I cruised to the "healthier" section trying to bypass all the sodium ladened goodies and landed my eyes on a Beef Stew frozen dinner, single serving.  As I stood there drooling the old burnt out light bulb came on.  Do what you use to do, cook how you use to cook, only cook with the idea of dividing the meals into single servings and freezing them once done.  Well duh!!  So I hit the poultry department and the produce department and knowing I was headed to Sam's Club I waited to get my Chuck roast there because I knew I'd get a better price.  Now with one meal behind me and a couple more planned in the next few days, I should have a nice variety of heat and eat meals that will fill my belly and keep me satisfied, AND being nutritious, with my focus being largely on reduced fat and sodium.  One other note, I can now make meals specific to my cravings and desires instead of trying to make a meal that would please several different tastes.  So off I go on my newest adventure.  I often say, the only thing you can count on in life is change, and I've learned you either fight it or you embrace it!  Let's cook!

This dish was cooked in an electric roasting pan with the lid on.  If roasting in a conventional oven I would personally leave the chicken uncovered.
My mind always goes straight to the tortilla and cheese mode, so a lot of my "eats" are intended for tacos, burritos or quesadilla.  That's the direction I was going with this, but it would be delicious over rice or pasta, or just a reduced carb meal served by itself.

Ingredients:
6 boneless, skinless chicken breasts
2 Tbsp Mrs. Dash original blend
1 tsp cumin
2 tsp granulated garlic
1/2 tsp granulated onion or powder
2 tsp crushed pepper flakes, opt
2 Tbsp worcestershire sauce, reduced sodium
1 tsp liquid smoke
2 tsp apple cider vinegar
1/2 c olive oil or more
2 Tbsp finely chopped cilantro
1 large sweet onion, or 2 small ones
2 red bell peppers, can use orange or yellow
2 green bell peppers, can use anaheim instead or poblano
6 small mushrooms, opt
In a small bowl add all the dry spices including pepper flakes.  Add wet ingredients except olive oil.  Mix together well.  Now add enough olive oil to make a mixture the is somewhere between a rub and a liquid consistency.  After mixing that together add the cilantro and then you will need to add a little more Olive oil.  Note:  if you don't have apple cider vinegar you can sub lemon juice.
Pat chicken dry and give each piece a good rub and place in your roaster or a baking dish.
Bake or roast at 325º.  Typically in an oven that would take approx. one hour.  Internal temp needs to be 165º before serving.  In my roasting pan (this one is a 20 qt) I find that things cook much quicker so I checked mine at 45 minutes and it was already to temp.
While the chicken was cooking I placed the veggies in a bowl and drizzled with olive oil and seasoned with some McCormicks seasoning.  You can use whatever seasoning  you like or skip this step altogether, but I LOVE the extra flavor so I like to season mine, I would suggest using Mrs. Dash if you are watching your sodium.  Set these aside while the chicken is cooking.
Since I like a little texture left in my peppers, I chose to wait until the end of cooking time to add them.  I placed them on and around the chicken, turned the heat off, placed the lid back on and let them"steam" for 10 minutes.  If roasting in an oven, I'd cover the chicken uncovered but, cover the dish for the last ten minutes after the vegetable were added, or you could add the vegetables about 20 minutes before end of cooking time and leave uncovered.
Remove chicken and veggies and allow to cool for a few minutes before slicing chicken.
Today's meal was soft tacos, big surprise!!!  I used cilantro to garnish and salsa verde to pour over them.
There are many ways to make salsa verde but one of my go-to recipes is super simple and so delicious, it tastes like the salsa my favorite burrito shop here in town serves.

Ingredients:
28 oz can of tomatillos
1-2 red or green jalapeno or any hot peppers, I also use habaneros
1 tsp granulated garlic  
Salt to taste; be sure and taste your salsa at completion before adding any!
NOTE: You can also use dried chiles such as Chile d Arbol or Japones.

Place the peppers or dried chiles in your food processor with one or two tomatillos.  Whiz until pureed.  Add more tomatillos a few at a time and puree.  You may need to add a little juice from the can as you go.  Once all are pureed add the rest of the juice from the can and the granulated garlic.  Give a good whiz then taste.  There is a good amount of sodium in the juice so be sure to taste before adding additional salt.  If you don't like heat but love salsa, just leave out the peppers or dried chiles.  The tomatillos themselves have no heat.

This is a simple recipe, cooked in one hour, for under $10, of course this depends on the cost of chicken breasts in your area.  It will feed six to twelve people depending on how you serve it.  This chicken was tender, juicy and very nicely flavored with a medium amount of heat.  Want more heat, add more red chile flakes.  

Now time for me to bag my "leftovers" into single serving portions an pop in the freezer for another delicious heat and eat meal.

For a true authentic salsa verde recipe go to Just a Pinch and check it out: https://www.justapinch.com/recipes/sauce-spread/salsa/roasted-tomatillos-salsa.html?r=3

Sunday, April 9, 2017

Grilled Fajita (Skirt Steak) Burger


I promised a review on my take of a Fajita Burger...is it worth the effect and expense?  I have to say I was a little disappointed.  In my opinion the worthiness of a burger comes from the flavor of the meat, the patty makes the burger!   I was expecting a juicy beyond belief burger loaded with flavor, what I got was a fairly lean, somewhat dry burger with less than robust flavor.  The only saving grace was that they were grilled over charcoal and mesquite wood, which gave them a nice char grilled flavor.


That being said, every piece of meat is different.  Two slabs of skirt steak, two different amounts of fat.  Although the slab I cut and ground up for these burgers seemed to be fatty enough, that did not shine through in the final product, and we all know that fat means flavor!!


It was a fun challenge though, a self-appointed challenge, but probably not something I'd do again, especially considering the price of Skirt steak.  I think I will save it for the medium rare, sliced meat fajitas we normally grill, those are to die for.


Ingredients and Directions:
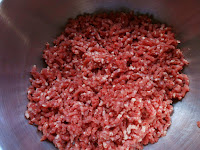
1 "slab" of skirt steak, cut against the grain in strips and fresh ground, this made 4 large patties
1-2 bell pepper, sliced
1 lg. sweet onion, sliced
Grated cheese
Small (6") flour tortillas
Salsa, pico de gallo and sour cream can be added as garnish
Seasoning of choice (I used Tatonka dust, granulated garlic and black pepper)

Form your patties and grill over direct heat until medium (or your preference).  Once the burgers are just about done, we like to place the cheese on top, close the grill and let it melt♥


While your grilling the burgers, place the sliced pepper and onions in a grilling basket or on a slotted grilling tray and grill over the heat source, be sure you toss them with tongs often to keep them from burning, however, I do love charred veggies too!!  


(You can either toast your tortillas before you grill your burgers or once you are finished grilling them, I have done it both ways).  Lightly brush flour tortillas with oil and heat them over your heat source just long enough to toast and make crispy.


Now build your Fajita burger!!  I added some red salsa on top of mine, just as I would if I were eating a regular fajita.  Topping with pico de gallo would also add another level of flavor and even a little sour cream!  
All in all a good burger, but it could have been made from any 85/15 cut of beef with no significant flavor advantage.  I have to say a brisket point is my all time favorite cut of meat for a scrumptious burger, fresh ground of course.  But then.....that's another blog!

Happy grilling and happy eating♥

Thursday, February 18, 2016

Mexican Style Lasagna

After a long, sad, dry spell from cooking, I'm finally returning to the kitchen on a regular basis, and ideas are starting to surface again.  Not sure what prompted this one, but whenever a new idea comes to me I try to run with it.


I've seen various Mexican Lasagna dishes floating around, and they all look wonderful, but one thing I noticed, is they all seem to use either corn or flour tortillas as the "pasta".  I decided I would try to take this to the next level and make it the closest version of authentic Mexican cuisine I possibly could, keeping both "lasagna" and "Mexican" in mind.  I carefully selected true Mexican cheeses, I made the sauce (enchilada) from scratch using re-hydrated dried chiles and made a chili  powder infused pasta. Now it's time to get cooking.


Chili Infused Pasta Dough

Ingredients:
1 c all purpose flour
1/2 tsp garlic salt
1 tbsp chili powder
1 pinch cumin (just a pinch!!)
2-3 tbsp. water
1 egg yolk

Kitchen Aid Mix directions: Place flour, garlic salt, cumin and chili powder in mixing bowl and mix together by hand.  Place dough hook on mixer, add egg yolk and water and mix on med. speed.  If dough does not come together as a ball, add a little more water, about 1 tsp at a time.  Once dough forms a ball, knead for about 1 minute.  Wrap tightly with saran wrap and refrigerate for at least 30 min.

By hand directions:  Place flour in a large semi flat bowl or on counter top, mix in chili powder, cumin and garlic salt.  Make a well in the center, add the egg yolk and a little water at a time mixing by hand till dough starts to stick together. Knead for about 5 min. Form into a ball, wrap tightly in saran wrap. Let rest for at least 30 min.  

After dough has rested, cut into 4 quarters, using your KA pasta roller, roll each quarter out starting with the widest setting on your roller. Fold in half and send through roller again. Now adjust roller to the next smallest setting.  I go down to my next to thinnest setting. You want a thin dough, but not thin enough to see your hand through.  If rolling out by hand, roll thin strips.

Next, make your sauce (if you chose to use a can sauce, try to find a good rich quality sauce, you will need approximately 2 cups).


Enchilada Sauce

2 guajillo dried chiles
2 New Mexico dried chiles
2 Pasilla chile peppers
2 c chicken stock, low sodium if using store bought (home made is better)
1/4 c canola oil
1/4 corn flour (masa harina)
1 tsp granulated garlic
1/8 tsp cumin
1/4 granulated onion
salt to taste

Break your dried chiles in half and remove seeds.  Now tear them apart a bit more, place in small pot of water.  Bring to a simmer and let the go for about 5 min.  Turn off heat and place a lid on them. 

While the chiles are re-hydrating, warm your chicken stock and cook your taco meat, (see next step).  

Remove the chiles from the water and place in a food processor.  You can add a little of the water from the pot, about 1-2 tbsp.  Now puree the chiles.  I like to push my mixture through a sieve to make sure there are no little bits of chile skin left.  Set aside.

Add about 1/4 c of cooking oil to a skillet.  Once oil is med. hot add in 1/4 c corn flour to make a roux, stir for a minute or two then add the chile paste.  Stir that in well, add the granulated garlic, onion, and cumin and stir.  Now add the chicken stock, stir constantly until mixed well and no lumps, now let simmer on low until it thickens.  You don't want a super thick sauce, but you don't want a runny sauce either.  Once sauce is medium thick, taste and add salt if needed.  

You might end up with more sauce than you need, but it keeps well in the fridge for several days or it can be frozen.  It's great to pour over burritos or chimichangas.

Taco Meat

2 lbs of lean ground beef
1 tsp granulated garlic
1 tbsp chili powder
1/4 tsp cumin
1/4 tsp granulated onion
salt and pepper to taste

Break up your ground beef in a skillet, add seasonings and brown. Set aside.

Cheese's for Filling

8 oz Oaxaca (Mexican Mozzarella), grated
8 oz Manchego  (Mexican Parmesan), grated
12 oz Mexican Crema Sour cream (use instead 
of Ricotta)


Everyone has a different way of layering their lasagna, but this is how I did mine:  Spoon a little sauce in the bottom of a 12" cast iron skillet, or baking dish (I also spray the sides of my dish with non stick spray).  Layer with pasta, no need to precook pasta since it's raw, it cooks very quickly.  

Now spoon on some Mexican Crema and spread out over pasta. Next add half of your taco meat, then ladle on some sauce, just enough to cover meat, then some grated cheese, (about 1/2 of Oaxaca & 1/3 of the Manchego).  Now add more pasta strips and repeat.  After adding my second layer of goodies my skillet was full to the top, so I stopped at that point (2 layers).  I had additional Manchego cheese left, so I saved it for another meal/dish.

Bake at 400º for about 45 minutes or until cheeses are all bubbly and browning.


Allow to cool for about 15 minutes....if you can wait that long, then slice, dish, and dig in. These combination of cheeses gave it a nice chewy texture and the flavor was deliciously Mexican, and unlike any other Mexican style casserole I've had before.  I would have to label it the perfect "Mexican Lasagna".


Thursday, August 13, 2015

TexMex Cheesy Cream Corn


Who doesn't love fresh corn!  Nothing  better than that nice crunch, that sweetness of the good earth.  I have made many different types of corn salad, almost anything goes with corn, but today I was reminded of cream corn.  Wow, what a blast from the past.  I grew up on canned cream corn, and even fed it to my family, but these days there are very few products we eat out of a can, so, I felt it was time to conjure up a fresh cream corn recipe. First I start by listing some of my favorite ingredients that would pair well with corn, and of course it took a sharp right turn to the southwest.  So off to the kitchen I went to see how it would all fall together.

Ingredient list:
3 c fresh corn
8 oz bacon
1/4 c diced scallions
1/4 c each red and orange bell peppers
1/4 Anaheim, Jalapeno, or Serrano peppers
1/2 tsp. granulated garlic
1/4 tsp. granulated onion
1/4 tsp. black pepper
3/4 tsp. sugar
salt to taste
1 tsp. McCormick's Mexican seasoning
1 1/2 c grated cheddar cheese or your favorite Mexican melting cheese
8 oz. cream cheese
1 1/2 c chicken broth
Cilantro for garnish

Begin by cooking the bacon.  I like to lay it on a baking sheet and cook in the oven on 375° for about 20 min, time depends on thickness of bacon.  Once cooked, allow it to cool then chop it up and set aside.  


You will need to chop your peppers, you can use regular orange & red bell peppers, or the mini sweet peppers.  For the heat in the dish, Serrano and Jalapenos are hotter than Anaheim peppers, so go bold, or go mellow, whatever your palate tells you.  For the scallions I like to use scissors, just cut the green off of a few bunches, into small pieces.


Now remove the corn from the cob.  I found a helpful tip from Rachel Ray works best for me. Place a small bowl inside another bowl, upside down.  Sit the corn on the inner bowl and cut downward on all sides, this keeps all the kernels in the outer bowl and off of your counter top.


Now we're ready to mix it altogether.  In a medium size bowl place all your dry ingredients, season with granulated garlic, granulated onion, sugar, black pepper and McCormick's Mexican seasoning.  Toss really well to incorporate all the seasonings with the corn.  Now add in the grated cheese and toss again.  You can add salt, but if you are using store bought chicken broth, be sure to taste test the mixture first for saltiness before adding any.


In a small saucepan heat 1 c of chicken broth with 8 oz of cream cheese on very low until you are able to whisk the cheese and break it down completely.   Pour the warm cheese sauce over top and mix together, then place in a casserole dish or an elec. skillet that you have sprayed with nonstick spray. Bake in the oven on 350° for about 20-30 min.  If using an elec. skillet, place on warm for about 15 min. All you're really trying to do is melt the cheese and infuse some of the pepper flavor into the dish.


Allow to cool for about 20 min. before serving.  Garnish with cilantro when serving.


Nothing says summer like fresh corn.  Enjoy!


Tuesday, June 16, 2015

Grilled Steak Sammie

Well Spring has sprung and now Summer is fast approaching, and it's the time of year that I revisit some of my old standby recipes that are easy to make, and can be made from start to finish on the grill. 

A few years ago I had to buy a gas grill due to open fire restrictions caused by a severe drought situation.  That's when I started playing with ideas and this is one I came up with.  It's just a grilled sandwich right?  True, but it is one of the most flavorful sammies I've ever put in my mouth.  Honestly for this one, the secret is the bread!  Jalapeno Cheese bread, or JC focaccia bread, it makes all the difference in the world, and it has to be grilled!!

What you'll need:
Tender steak or roast, sliced paper thin
Grill seasonings of your choice
Muenster or Asadero cheese, grated
Sweet onions, sliced
Portabello or large brown mushrooms, sliced
Jalapeno cheese bread or Jalapeno cheese Focaccia bread
Skewers, or grilling basket for steak
Grilling basket or slotted grilling pan for onions and mushrooms
Slotted grilling pan for sammies

When I said simple, I meant really simple. The first time I made this I used thin sliced sirloin, this last time I used paper thin sliced chuck roast, and honestly I liked the chuck roast better.  

Time to get started!  Season your steak as you normally would for grilling. I use a combination of granulated garlic, granulated onion, black pepper, coarse sea salt and a drizzle of olive oil. I place the slices of meat in a bowl and toss a few times to coat.  I do the same with the onion and mushrooms.

When slicing the bread, if using Focaccia you will slice it horizontally, not vertically.  Use butter or oil and lightly brush the inside of the bread and place on grill to toast, then remove from grill.  I like to grill my bread first, then place grated cheese on the bottom half while it's still hot.

Then you just grill your meat in one basket, or on skewers, and your veggies in another. Once all is done I start stacking up my sammie, adding another layer of cheese on top of the meat, then topping it off with veggies.

Last step is to place the sammie on a slotted grilling pan and sit back inside the grill, lid closed, with indirect heat and allow the cheese to finish melting.


Wala!  One of the best grilled sammie's you will ever eat, and it takes less than thirty minutes of your time (not including prep work).


Hope you try this, and hope you enjoy it as much as my family does!

Monday, May 18, 2015

A wanna-be camper.....Breakfast on the grill


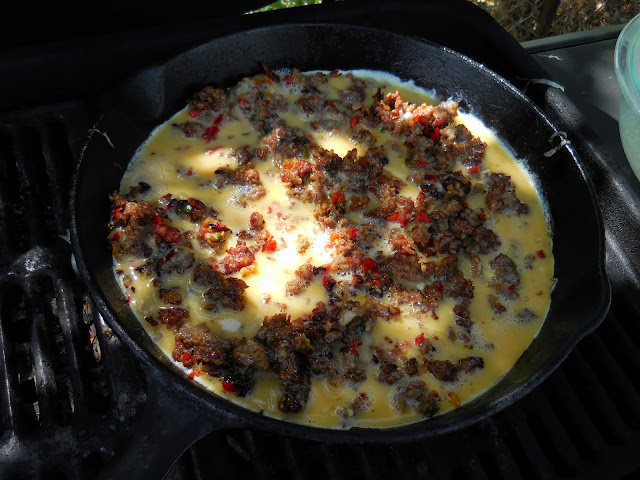
I haven't camped out in a couple of decades, but that doesn't mean I don't like the "feel" of the great outdoors.  These days the closest I come to camping is cooking and grilling in my own backyard.  I have recently acquired a new found love of cooking non traditional "grilled" meals on my grill.  It drives my cats crazy, but I sure do enjoy it.  Today I took an old recipe of mine, "Breakfast in a Skillet", and made it on the grill.  The only thing I changed is I shredded my potatoes and made hash browns as the base instead of the potato rounds I normally make.  So here's a look see at what went down.

Ingredients you will need:
4 med. russet potatoes, washed and shredded
1 lb. breakfast sausage
1 jalapeno, diced
1 fresno pepper, diced
1 small sweet onion, diced
12 eggs
1-2 cup shredded cheese
Olive oil, Criso, salt & pepper
Two grill proof skillets, I use cast iron

I started by washing and shredding four medium russet potatoes.  I soaked them in water for about 1 1/2 hrs.  You want to be sure and soak them at least one hour, it helps remove a lot of the starch and they don't turn out all mushy.  Then I rinsed them well and placed them on paper towels, and then patted them dry.  Next I put them in a bowl and drizzled them generously with olive oil and salt and peppered them.  I used Crisco to rub on the bottom and sides of my 12" cast iron skillet.

For the sausage:  I placed the sausage, onions and peppers in another skillet and cooked them until the sausage was brown. Then I turned that side of the heat off and let them sit until I needed them.

For the hash browns:  I put the 12" skillet on the grill over medium heat and let it get fairly hot. Then I dumped the potatoes in and patted them out on the bottom. At this point I turned the heat to low and let them cook (lid closed) for about 30 minutes, until I could put my spatula under them and they did not stick to the pan, then I flipped them.


Adding the sausage and eggs:  Next I added the sausage and peppers on top, then I poured the eggs in.  I continued to cook over low heat, with the lid closed for about another twenty minutes, checking on them a couple of times.  


Once the eggs firmed up I was ready to add the cheese and turn off the heat.

I left the skillet on the grill (no heat) with lid closed for a few minutes till the cheese melted.  At this point it was time to go back inside under the A/C and my "camping" experience was complete.  I allowed the dish to cool to room temp, loosened the sides and lifted it up with the spatula and slid it out onto a cutting board and sliced it like a pizza.  I love serving egg dishes with tomatilla salsa, I am also a fan of red salsa, but I think the green salsa just screams "eat me with eggs"!


Below is a link to this dish with potato rounds as a base, done in the stove top/oven.  I've made is so many times I can't count.  What I love about this dish is you can use any type of meat, as long as it's precooked, any type of veggies, or none at all, and any type of melting cheese.  Let your imagination be your guide.  Enjoy!


http://www.justapinch.com/recipes/side/potatoes/breakfast-in-a-skillet.html

Tuesday, January 20, 2015

Grilled chicken meets Quesadilla


Grilled Chicken Quesadilla stack


Ingredients:

2 6” reduced carb tortillas
½ grilled chicken breast
2 roma tomatoes
Any good white melting cheese grated, I used Muenster 
Cotija cheese, crumbled
Fresh cilantro
Sweet onion diced
Olive oil
Mesquite Habanero seasoning

Let me first say, if I owned a Food Truck, Diner, or Bar & Grill, this would be on the menu everyday.  The flavor of the luscious juicy slow grilled chicken, with the heat and little bit of citrus flavor of the Mesquite Habanero seasoning, and the sweetness from roasting the tomatoes, made this one of the most stand out quesadilla I've made to date.  And believe me when I say, I LOVE quesadillas and have made them out of most everything.

OK to get my head out of the after glow of eating this soul satisfying dish, this is how it went down.

For the chicken

NOTE:  You can of course buy rotisserie chicken or deli chicken, but if you enjoy grilling it's worth it to cook your own.


I "spatchcocked" a couple of chickens, which simply means I removed the backbone which allows you to open the chicken up and lay it out flat, making for more even cooking, and it reduces the amount of cooking time as well.  Then I brined them in a bath of water and Owens BBQ Buffalo Wing Brat Seasoning seasoning.  I brined them for a few hours, which is all the available time I had before grilling.  You could brine them overnight it time allows. Then I removed them from the brine and patted them dry with paper towels.


If I had not recently found a new spice to try out, I would have used the Buffalo Wing Brat seasoning in my rub as well, but for this cook I  I wanted to try my newest spice addition so I mixed together some olive oil, Mrs. Dash original blend and the Mesquite Habanero seasoning.  

I used the wet rub under the skin, on both top and bottom of chicken and on top of the skin. Then I placed them on our grill using indirect heat from both charcoal and mesquite wood. I cooked them for about 3-3 1/2 hrs at about 250°.  Because I knew I would be reheating the chicken at a future time, I took them off at 160° internally, if you plan to eat chicken right away, you should cook it to a safe 170° internal temp.

For the quesadilla

Directions:

1. Slice tomatoes and roast in a skillet with a little olive oil, season with Mesquite seasoning.  Once tomatoes are tender, remove to a plate. 


2. Place one tortilla in your hot skillet and toast one side, flip, then add a generous amount of grated Muenster, place roasted tomatoes on top, heat till bottom of tortilla is toasty.  Remove to plate.  Now place diced onions, cilantro and more grated cheese on top of roasted tomatoes.  
3. Place sliced grilled chicken breast in skillet and heat on both sides until nice and warm, seasoning with Mesquite spice.  Remove and place on top of loaded tortilla and top with more grated cheese. 
4. Place your other tortilla in hot skillet, toast on one side then place on top of quesadilla, hot side down.  Now carefully (using spatula) place quesadilla upside down in skillet to brown top side, place lid on skillet to help melt cheese.  Once bottom of tortilla is toasty, remove to plate. 
5. Cut quesadilla in half, and then cut in half again.  Stack all four sections on top of each other and hold in place with a small skewer.  Garnish with more cilantro and Cotija cheese.


For information on purchasing Owens Buffalo Wing Brat Seasoning or any of their awesome products check out this link: