Saturday, August 30, 2014

Dog days of summer.......

You know you're a die hard when it's 100° in the shade and you still fire up the grill.  It's a sickness you know!  Today hot dogs are calling my name.  I love em...love em all...dolled up and dressed to kill...or just plain and homely, I love hot dogs.

I've been craving chili dogs but felt like I wanted a little some'em some'em different today, so after scratching my head for a little while, this is what I came up with.  Chili cheese jalapeno onion dog.


Ingredients you will need:

**Your favorite hot dog, today I used Nathans
**Cheddar cheese, grated
**Fresh jalapenos and/or fresno peppers, sliced into rings
**Sweet onion, sliced
**Chili
**Buns

This grilling basket is one of my favorite and most often used grilling accessory, great for grilling veggies or thin sliced meats. Place your onions and peppers in grilling basket and grill over high heat tossing often with tongs.


Meanwhile you want to grill your dog, heat your chili, and toast your buns. Takes a little multitasking to do it all simultaneously, so best to attempt this before the sun and beers go to your head!


To make this a simple all-in-one cook, after my dogs are cooked to perfection, I place them in the toasted buns, spoon on some warm chili, top with some grated cheese, and the grilled onions and peppers.  Then I place them on a part of the grill that does not have direct heat and close the lid.  In just a couple of minutes you have the perfect dog, every time.

Every dog needs a good chili and this is one I really like for hot dogs.  The recipe makes a BIG pot, so when I make it I like to divide it up and freezer it so I always have some on hand.


Hot Dog Chili

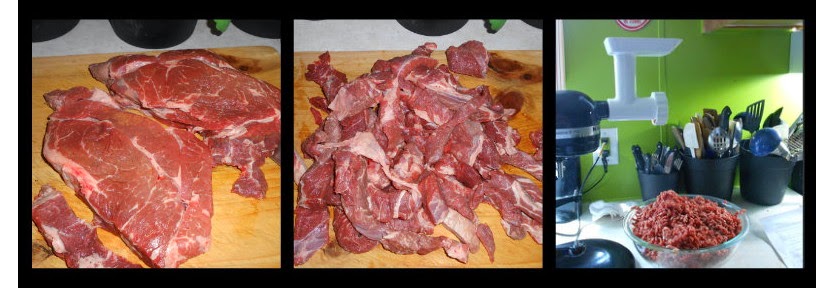
5 lb. lean ground beef
5 clove garlic, grated
1/2-1 c sweet onions, chopped
4 c beef broth, homemade or reduced sodium
1/2 c ketchup, reduced sodium opt
2 tsp spicy mustard
2 tsp lemon juice
2 tsp sugar
1 tsp coarse sea salt
2 tsp black pepper
1/4 c chili powder, mild or hot
3 Tbsp. cumin
2 tsp adobe chili powder
1 tsp Mexican oregano
1 Tbsp. granulated garlic
1 Tbsp. granulated onion

Directions
1 Chop onion, grate garlic and place both in large soup pot with a little (2 tsp) olive oil, add ground beef and cook till beef is light brown.
2 Add remaining ingredients stir well, place lid on and simmer for about 30 min.

3 For a finer chili, place chili in food processor small amounts at a time and pulse. This will grind up the meat and make your chili very fine!

So next time you get hungry for a hot dog, whether you are feeling adventurous, or just want something plain and simple, go out and fire up that grill, you know you will thank yourself and so will your family.

Here are a couple more chili recipes that would work great with hot dogs:
http://www.justapinch.com/recipes/soup/chili/my-texas-chili.html
http://www.justapinch.com/recipes/main-course/mexican/chili-sauce.html


Sunday, August 24, 2014

A day in the life of a smoked roast......

Ah, so my Saturday morning begins, anticipating the sun rising and the glorious smell of 
hickory smoke wafting through the air as I commence on my morning chores.  Todays cook is going to be Chuck roast.


So lets go back to the beginning.  Yesterday I found some beautiful chuck roasts for a lovely price, so I picked up a few not knowing exactly what I would be using them for. Well that didn't last long, on the short drive home from the store I knew I would be smoking two of them for some scrumptious meals later in the week.  Having my cabinet full of spices on top of spices, most everything under the sun, I had to decide on what flavor profile I would be using, knowing I needed something that would compliment the smoke flavor of the hickory wood, I decided on Tatonka Dust. So before I went to bed I sprinkled a generous amount on each side, rubbed them down, and put them in the fridge for a long nights sleep.


What is Tatonka Dust you ask?  Well taken right from the source since I can't described it any better myself:

"Tatonka Dust has a unique flavor-it is Worcestershire powder, soy sauce powder, and a charcoal seasoning base mixed with onion, garlics, peppers, salts, and some other secret spices that blend together perfectly for that one of a kind flavor".


I like to use charcoal to start my fire, then add wood that I have soaked overnight in water. The soaking of the wood helps to keep it from burning up too fast and it gives you more smoke than dry wood does. Todays goal is to keep the smoker right around 225° Mmmmm, the smell is intoxicating!


 After smoking these beauties for about 3 hrs I wrap them in foil and let them continue to cook on the smoker.  For this particular cook, I'm wanting a super tender, pull apart roast, so I will continue to cook until internal temp reaches 190-195°

Mission accomplished!  I always love the reveal, anticipating what the final product will look like, will taste like, and rarely am I disappointed, today being no exception.  A juicy, fork tender roast with just the right amount of hickory flavor and seasoning, sure glad I smoked two of these babies, they came out just perfect.


So next time you fire up that smoker, show a Chuck roast a little love, and try some Tatonka dust, we just love it!

Saturday, August 23, 2014

Pita Pocket Burgers

And today's burger journey begins.  A loved one is coming home today for a visit, and by request it's Burgers!!!


My usual go to for making burgers is chuck roast.  I have used many other cuts of beef but chuck is the favorite here.  If you have never had the opportunity to grind your own meat for burgers, let me tell you, it's something you need to try, someday, someway. It enhances the flavor of the burger ten fold.


Ingredients:
(Makes 6  half pound burgers)
3 lbs ground chuck
3 pita pockets, cut in half
1 lb mozzarella cheese, grated
6 large mushrooms, sliced
1 large sweet onion, sliced

I got the idea to make the "pita" burger when I bought some low carb pita pockets recently.  They are very thin and when slightly grilled, they are astonishing!  I like to enjoy my "burger" and not fill up on bread, so these are perfect.  The fact that they are low carb was purely accidental,but a huge plus to me. 


First I formed my patties in a round shape as I normally would.  Then I cut off the top 1/3 and pat the flat edge by hand to "tighten" it. If you are grilling your burgers outside you really don't need to drowned them with spices, let the fire or coals do the seasoning for you.  Since we already had the smoker going today, we ended up putting the grate in the smoker box and cooked the burgers over hickory wood.  My personal preference is a burger that is cooked to medium.  But any way you shake a stick at it, grilling burgers outside, wood, charcoal, or gas, is the way to go!


Grill as you normally would, once burgers are done to your likeness, top with grated cheese while still on the grill, close lid for a couple of minutes, then remove patties, it doesn't take long for the cheese to melt!
Grill the mushrooms and onions, toast the pita bread.  Assemble and enjoy the fruits of your labor.

I have an assortment of grilling baskets and flat slotted trays to use for grilling veggies. Look in the grilling section of any major store, or go online, the options are limitless.

Next time you're craving a burger, fire up that grill, you won't be sorry!

Thursday, August 21, 2014

Pizza Poppers, not your average joe.....

Ah...the good ol "popper".  Whether you grill them, smoke them, or bake them off in the oven, nothing beats a popper.  Today was Pizza day, so baking it was!  There are thousands of ways to stuff a pepper, but personally I've never turned one into a "pizza". The idea came to me while surveying the contents of my fridge....5 lbs of Mozzarella, 2 lbs of Mini Sweet Peppers, and pepperoni....it was fate!


Ingredients:

12 mini sweet peppers
1 c mozzarella, finely grated
1/2 c finely chopped pepperoni
1/2 c finely chopped canadian bacon 
1/2 c pizza sauce

The amounts here are approximate because you will have a variety of different size peppers.  I like to lay my peppers out and see what side they lie the flattest on, that way you will have a more stable pepper.  Then you will cut your peppers off diagonally just above the stem line.  Now remove what few seeds are inside.


Next dice up the pepperoni and canadian bacon and grate your cheese and mix with pizza sauce altogether in a bowl, it's just that simple.


Now gently press as much filling inside each pepper as you can, leaving it heaping on top.  


Bake in a preheated 425° oven for about 20 min.  If grilling or smoking, time will depend on temp of grill or smoker.

Let me tell you, these are ADDICTING!  If eating while still hot, be sure to use a napkin, they are juicy.  The juiciness subsides as they cool.  So next time you're in the mood for some pizza flavored goodness, give these a try.  Much less work than making pizza from scratch, but all the awesome flavor you get in a pizza.  Play a little, try to mix and match your own filling ingredients.

Here are  a few more "poppers" you might like to try:
http://www.justapinch.com/recipes/main-course/turkey/cheese-suffed-sweet-peppers-with-sauce.html

http://www.justapinch.com/recipes/appetizer/appetizer-vegetable-appetizer/brat-stuffed-peppers.html


http://www.justapinch.com/recipes/appetizer/appetizer-vegetable-appetizer/prosciutto-wrapped-mini-sweet-peppers.html

Tuesday, August 19, 2014

The many faces of Hash

I love finding treasures tucked away in my freezer that I had forgotten about.  Yesterday was my lucky day.  While putting my reorganization skills to good use, I found a bag of smoked ham I had stashed a while back.  I wasn't sure at the time what it would become, but I knew it would be on Tuesdays menu.
Motivated by a friendly five ingredient food challenge I was participating in, I put my thinking cap on and BAM, hash was born.  I've made hash many times, most of them included some type of grilled or smoked meat I had leftover, even sausage links.  The beauty of hash is, there are no rules.  Throw your favorite ingredients together and call it hash!  Of course I always use potatoes, and peppers and onions, and for some reason mushrooms just seem to fit in as well.  Keeping with my five ingredient limit, I knew I need to be a little more creative than usual.

I could not use oil to "fry" my potatoes in, so I cut off some fat and skin from the ham and rendered it down to substitute for oil.  

Ingredients:
Smoked ham, cubed 
Russet Potatoes, cubed
Anaheim peppers, diced 
Red onion, large chop
Mushrooms, sliced

In the end I used 2 c cubed ham, 5 med. potatoes, 2 anaheim peppers, 1 onion and about 6 brown mushrooms.  I washed the potatoes and left the skin on.


I cooked the potatoes and peppers in the ham fat over med high for about 15 min, stirring often, then added the onion.  Cooked another 15 min till slightly fork tender, then I added the ham and mushrooms.  Then I let it cook about 10 min longer until the ham was warm and the mushrooms were semi-tender.  I added black pepper along the way since salt and pepper were "free" ingredients.

I served this to my hubby with fresh cherry tomatoes from my neighbor, and a nice slice of mozzarella cheese.  On a more industrious day I would have served with sunny side up eggs.

So next time you have some leftover beef, pork, sausage, even chicken, but don't have enough to serve as a entree`, make a big skillet of hash and enjoy!

Here are some more hash recipes you might enjoy.


Friday, August 15, 2014

Dried chiles make the marinade go round.......

Over the last couple of years I've become fascinated with dried chiles.  I've learned from some of the best authentic Mexican cooks how to use these in various dishes, and I'm still learning. One day a few months ago I got this wild hair up my.......sleeve, and decided I'd make a marinade using some.  I went into the kitchen and concocted a little brew, tasted it and sent it straight to the trash, however, I knew I was on to something amazing.  I made a second batch, after realizing I didn't need such a massive amount of vinegar, and wala, I created a beautiful and wonderful tasting wet marinade.

As time went on I used the same ingredients, but used a varying amount of olive oil and chiles and found that I not only could create a wet marinade, but also a wet rub and a paste type of rub. This is a recipe where you have the basic ingredients and you can play with them to make your own favorite consistency of rub or marinade.
The dried chiles I use for this recipe are Ancho or Pasilla chiles, the darker one  (left) which is just a dried poblano, and not hot at all, and New Mexico chile, (right) which you can buy in varying degrees of heat.  At times I even throw in some Guajillo chiles which are also very mild. Another plus to this recipe, is you can mix and match dried chiles to suit your heat taste buds.
Here is a "directory" of dried chiles and for your convenience.http://www.foodsubs.com/Chiledry.html

Basic Ingredients:

olive oil
2 tbsp reduced sodium worcestershire sauce
2 tsp liquid smoke
2 tsp apple cider vinegar
1/4 tsp dried ginger (powder)
1 tbsp fresh crushed garlic 
2 tbsp fresh cilantro
1-3 dried New Mexico chile pepper
1-3 dried Pasilla chile peppers


For the wet marinade (top picture) Place dried chiles, with stem and most of the seeds removed, into the food processor, and pulse as many times as needed to produce very small pieces. Then empty them into a bowl and do the garlic the same way. Then you will chop cilantro using a knife, add to bowl along with all other ingredients except olive oil.  Stir well to mix. Now add as much or as little olive oil as you want to make the consistency you are looking for.

For a darker rub, (bottom left) add chiles, garlic and all other ingredients to processor except cilantro.  Once again the amount of olive oil is up to the preparer.

The middle and last picture is with ALL ingredients chopped together in processor, the only difference is the amount of olive oil used.  For a more rustic color, add more dried chiles.

Here is an assortment of just a few of the meats I've used the recipe for.  This is also great to use on veggies before grilling.


For larger items like whole or half chickens, skirt steak, brisket, etc. I normally rub or put in the wet marinade and let sit in fridge overnight.  For steaks, chops, sausage or individual pieces of chicken I would try and let them sit for at least 4 hrs.  For burgers I simply rub and grill.  It's all up to a person's individual preferences.

Hope you try it sometimes, ENJOY


Wednesday, August 13, 2014

The good ol summer time.....

Grillin and chillin, that's what summer is all about in my hood.  Oh wait, maybe that's just me,after all someone has to work to pay for the groceries.  As the guys drive off to work, I begin my day with visions of my old smoker turned rotisserie, going round and round, round and round.Today I'm cooking a pork loin.  A gorgeous nine pounder, cut in half, forked onto the spit rod.  What does that even mean?  It's simply grilling without coals under my food, or for a more technical term, "cooking with indirect heat", while the loin slowly turns throughout the cook.  Whoever invented the rotisserie was a genius.  


When I cook, grill, or smoke a pork loin, or chicken for that matter, I like to brine it overnight.  There are so many possibilities for brines, I will let you conjure one up, or simply google it!  Personally I grab whatever I think will add flavor and go with the type of rub I'm planning on using, then just throw it all in some water and call it a brine.

It's important to rinse your meat if using a salty brine, and always dry the meat with paper towels before applying the rub.  For this loin I mixed together a homemade rub using typical ingredients right out of my pantry.  

Rub
1 c brown sugar
1/2 c chili powder
2 tbsp granulated garlic
1 tbsp granulated onion
1 tsp cumin
1 tsp black pepper


Mix all ingredients together in a bowl and rub your way to a beautiful hunk of goodness.  I've used this rub on chicken as well and it tastes like heaven as gives you a gorgeous presentation.  This should be enough to rub approx. 10 lbs. of grilled goodness.  Refrigerate or freeze any leftover rub for another day.


For rotisserie grilling, you want to create heat around the perimeter of your grill. I usually start with two mounds of coals, one on each end of my grill, or each side. By the way, my grill is a rectangular shape.  It's an old Char grill that I removed the smoker box from so I could use the rotisserie set up, as well as using it for a standard grill.  Once coals begin greying nicely, I use a long set of tongs and move my coals along both sides of the grill.  Depending on how much I'm cooking, I sometimes place them along the ends of the grill as well.  That's what I love about grilling, there's no one way to do it, there are thousands of ways.  As long as you achieve the end result you want, it really doesn't matter how you get there. 


 I cooked this beauty at a temp right around 325° for close to an hour,  with an internal temp reaching 145°.  It's important to realize that grilling times and temps typically vary from grill to grill, so be sure to use a meat thermometer to ensure you reach a safe internal temp.

Sliced up and ready to feast on, I had a brain fart, oh, I mean a VISION of how a brown sugar, butter sauce might taste with this.  So, at the last minute I melted some butter, added brown sugar to it and some leftover bacon pieces, I know, what the heck is leftover bacon anything!!!  This is a winner "sauce" and will be using it much more in the future.


1/4 c butter
1 heaping tbsp brown sugar
2 tbsp crispy bacon pieces

Melt butter, add brown sugar, stir to dissolve, add bacon. Spoon over sliced loin and serve.


Nothing like a good day with your grill to make to make your tummy smile.